Paper Quilling | Making Quilling flower bouquet step by step

In this post , i will show you how to make a Beautiful quilling flower bouquet with colorful flowers along with the two birds , by seeing its look like a bit difficult to make but if you know the procedure it will be very easy to make any quilling design as a beginner you should have required little bit patience , lets start with things required to make this wonderful design.

Quilling Materials and Tools :
1. Quilling Strips
2.Work board
3.Quilling Needle
4.Glue (Eg . Fevicol )
5.scissor
We can use above five things while making this design among mentioned in the picture .

Step 1 : Take a six 5MM strips and glue them tips of every strip then make a single strip use quilling Needle to roll and make a tight coil and create a petal by pressing inside and glue them .
We required 6 petals for one layer of a flower same procedure we can you for second layer of flower but with 3 mm quilling strips
Make all of them keep ready and start make a two layers of flower.


Now its time to create a Fringing flower to put it in middle of the flower , use scissor and fringe the two strips then glow them at edge of the strip and use needle to roll the fringed strip and make a Fringed flower.


Make 3 similar flowers

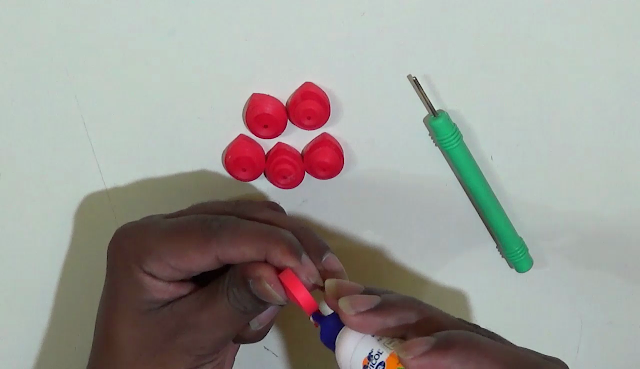
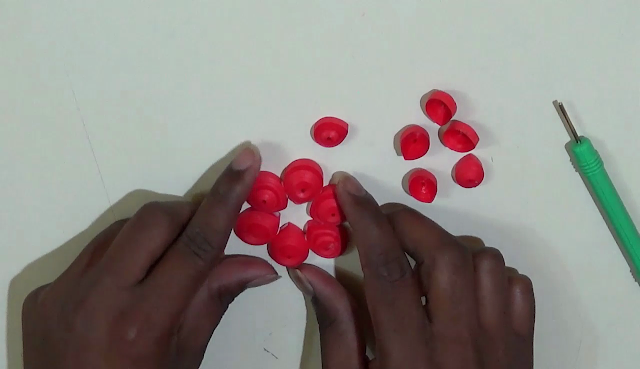
Step 2: Creating quilling flowers by using tear drop shape petals .
Take a 5 MM strip and roll it and make a tight coil , use work board to create a tweezer gule it at the tip of the strip and press it then our petal is ready . 10 petals required for each flower
make a tight coil and press inside like a dome , now its time to make a beautiful flower , stick all petals by glue and put a dome in middle .


Make 5 white flowers , 3 teal colored flowers and 3 Yellow flowers

Step 3 : Create a small leaves
Take a 5 mm strip and make a tear drop shape (explained the procedure above) , 5 tear drops are required to make a each leaves


Step 4: Create a basket by paper and decorate it by quilling strips .
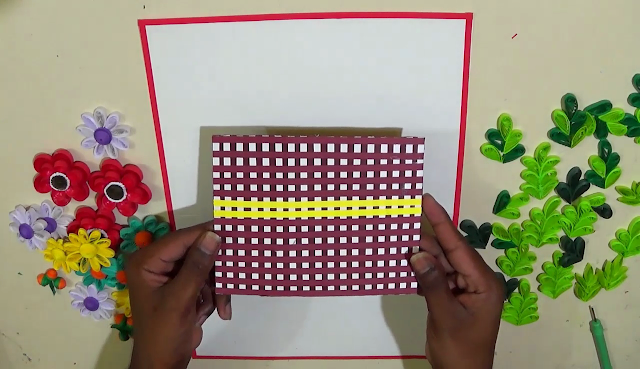

Step 5 : Take the A4 size paper and decorate with the basket and flowers


Step 6 : Draw a bird picture by using pencil .


Step 7: Use pins around the shape of the bird and make various types of tear drops and curve them how you want to fill the bird.


Step 8: Make two similar types of birds and decorate the greeting card with them.


i never know the use of adobe shadow until i saw this post. thank you for this! this is very helpful. florarie online cluj
ReplyDelete